This is the perfect summer appetizer, and a wonderful way to use up that zucchini! These fritters are loaded with feta cheese, panko, and lemon to make a Greek-inspired appetizer that anyone will love. Served with a dallop of Greek yogurt and a sprinkle of dill, they are fancy enough for company, and easy to make ahead! They're also lovely served as a simple lunch with crusty bread and a side salad. Enjoy these fritters with your next summer meal!
Zucchini Fritters with Feta and Dill
An impressive and delicious summer appetizer!
6 servings
2 medium zucchini, trimmed
1/2 teaspoon coarse kosher salt
1/4 cup thinly sliced green onions
2 tablespoons chopped fresh dill
2 tablespoons chopped fresh mint
1 garlic clove, minced
1 teaspoon finely grated lemon peel
1/2 cup panko (Japanese breadcrumbs)
1 large egg, beaten to blend
1/2 cup coarsely crumbled feta cheese
Canola oil (for frying)
Plain whole-milk or reduced-fat Greek-style yogurt (for garnish)
Additional chopped fresh dill (for garnish)
Grate zucchini on large holes of box grater onto clean kitchen towel. Sprinkle zucchini with 1 teaspoon coarse salt; let stand at least 30 minutes and up to 1 hour.
Line rimmed baking sheet with parchment or foil. Wrap zucchini in towel; squeeze out as much liquid as possible. Place zucchini in medium bowl. Mix in green onions, 2 tablespoons chopped dill, mint, garlic, lemon peel, and 1/2 teaspoon black pepper. Gently stir in panko and egg, then feta. Using 2 tablespoons zucchini mixture for each, shape mixture into 1 3/4- to 2-inch-diameter patty; place on baking sheet. Chill at least 1 hour to firm.
Pour enough canola oil into heavy large skillet to reach depth of 1/4 inch; heat over medium-high heat. Working in batches, add patties to skillet. Cook until golden and cooked through, adjusting heat if browning too quickly, 3 to 4 minutes per side. Using slotted metal spoon, transfer to paper towels.
Arrange fritters on platter. Top each with dollop of yogurt. Sprinkle each with dill. Serve warm or at room temperature.
Recipe adapted from Bon Appetit
Whether I'm cooking for my family, working as a personal chef, dining out, reading cookbooks, browsing recipe ideas online, or imagining my next meal, it is obvious that my life revolves around FOOD! This blog showcases what I'm eating and cooking with a variety of personal recipes along with some published recipes that I love, all right here for you to try!
Wednesday, August 29, 2012
Tuesday, July 17, 2012
Shrimp Tacos Gobernador
This is not a classic shrimp tacos recipe- this is comfort food. A smokey, Mexican-style tomato sauce makes the perfect bed for tender shrimp, and is bursting with flavor from the herbs and spices. Wrapped up in tender corn tortillas, these tacos are best served on a platter for guests to help themselves. The smokey and spicy tacos are perfectly complimented by a cool slaw or corn and avocado salad. Enjoy this different and delicious shrimp taco recipe!
Shrimp Tacos Gobernador
A smokey tomato sauce cradles tender shrimp in corn tortillas with melted cheese.
Serves 4
1 tablespoon olive oil
1 onion, minced
2 tomatoes, seeded and chopped
1 green or red bell pepper, diced
1 pound shrimp, peeled and deveined, chopped
1 cup canned tomato puree
1 teaspoon dried oregano
1 bay leaf
1/2 teaspoon smoked paprika
Salt and freshly ground black pepper
8 corn tortillas
1/2 cup shredded Oaxaca or mozzarella cheese
Lime wedges, for serving
Cilantro, for serving
Hot sauce, for serving
In a large heavy saucepan, heat the olive oil over medium-high heat. Add the onions and cook until translucent, about 3 minutes. Add the tomatoes and bell pepper and cook for 3 minutes. Add the shrimp and cook for 3 minutes. Stir in the tomato puree, oregano, bay leaf, and smoked paprika. Cook for 5-10 minutes until slightly reduced. Season with salt and pepper, to taste. Remove the pan from the heat and set aside. Remove the bay leaf and discard.
Heat a large heavy skillet over medium-high heat. Lay 2 tortillas, flat on the bottom of the pan, side by side. Put a small mound of cheese on 1 side of each tortilla. Wait until the cheese melts slightly, about 1 minute, and then add about 2 tablespoons of the shrimp mixture to each tortilla. Fold the tortillas over into half-moon shapes and cook to melt the cheese completely, another 1 to 2 minutes. Transfer to a platter and keep warm.
Repeat with the remaining tortillas, cheese, and shrimp mixture. Arrange the tacos on a serving platter and serve with lime wedges, cilantro and hot sauce on the side.
Recipe adapted from Food Network
Shrimp Tacos Gobernador
A smokey tomato sauce cradles tender shrimp in corn tortillas with melted cheese.
Serves 4
1 tablespoon olive oil
1 onion, minced
2 tomatoes, seeded and chopped
1 green or red bell pepper, diced
1 pound shrimp, peeled and deveined, chopped
1 cup canned tomato puree
1 teaspoon dried oregano
1 bay leaf
1/2 teaspoon smoked paprika
Salt and freshly ground black pepper
8 corn tortillas
1/2 cup shredded Oaxaca or mozzarella cheese
Lime wedges, for serving
Cilantro, for serving
Hot sauce, for serving
In a large heavy saucepan, heat the olive oil over medium-high heat. Add the onions and cook until translucent, about 3 minutes. Add the tomatoes and bell pepper and cook for 3 minutes. Add the shrimp and cook for 3 minutes. Stir in the tomato puree, oregano, bay leaf, and smoked paprika. Cook for 5-10 minutes until slightly reduced. Season with salt and pepper, to taste. Remove the pan from the heat and set aside. Remove the bay leaf and discard.
Heat a large heavy skillet over medium-high heat. Lay 2 tortillas, flat on the bottom of the pan, side by side. Put a small mound of cheese on 1 side of each tortilla. Wait until the cheese melts slightly, about 1 minute, and then add about 2 tablespoons of the shrimp mixture to each tortilla. Fold the tortillas over into half-moon shapes and cook to melt the cheese completely, another 1 to 2 minutes. Transfer to a platter and keep warm.
Repeat with the remaining tortillas, cheese, and shrimp mixture. Arrange the tacos on a serving platter and serve with lime wedges, cilantro and hot sauce on the side.
Recipe adapted from Food Network
Wednesday, June 27, 2012
Summer Flatbread Pizza
When I am on my own for dinner my favorite food to make is an individual flatbread pizza. I whip up a quick homemade pizza sauce and load it up with fresh toppings. With a drizzle of olive oil and fresh basil flatbread pizza is my favorite summer meal. The key to any homemade pizza is the cheese. Do not use the pre-shredded stuff! It makes such a difference to shred your own. Or, you can buy a log of fresh mozzarella and slice it thinly. It melts so beautifully over the toppings it seems decadent without having to use a ton of cheese. And whatever you do, don’t forget a pinch of kosher salt and pepper on top of the pizza; it causes the veggies to burst with flavor. Enjoy this summer meal!
Summer Flatbread Pizza
Simple and delicious pizza that lets summer’s bounty shine!
Pizza sauce, recipe follows
Fresh mozzarella cheese, shredded or sliced
Parmesan cheese, freshly grated
Garlic, thinly sliced
Onion, diced
Zucchini, diced
Tomatoes, chopped
Bell pepper, diced
Basil, julienne (thinly sliced)
Extra virgin olive oil
Heat oven to 425 degrees. Top the naan with sauce, fresh mozzarella cheese, and veggies, along with a sprinkle of salt and pepper. Bake 15-20 minutes until cheese is bubbly and crust is crisp on the edges. Remove from oven, sprinkle with Parmesan and fresh basil and drizzle with olive oil. Cut into wedges and enjoy!
Pizza sauce
Makes about 2 cups, enough for 2 large pizzas
1 32 oz. can crushed tomatoes
4 garlic cloves, minced
3 T. extra virgin olive oil
1 T. dried Italian herbs
Salt and pepper
Place olive oil, basil and herbs in a saucepan on low heat. Bring up to a sizzle until it smells fragrant but do not allow garlic to brown, about 5 minutes. Pour in crushed tomatoes, stir, and increase heat to medium. Sprinkle generously with salt and pepper, and simmer until slightly reduced, about 15 minutes.
Thursday, June 14, 2012
Turkey Jasmine Burgers
I love lightening up traditional recipes with healthy ingredients that not only make you feel good, but taste amazing too. These turkey burgers are the best I’ve ever had. Lean ground turkey is jazzed up with Asian ingredients that lend tons of fresh flavor. The sesame oil especially gives it a delicious, salty bite, and the jasmine rice makes the patty tender and moist. The sweet and tangy cucumber salad and a smear of smooth wasabi mayo take this burger over the top. These ingredients may seem unusual for a turkey burger, but the combination is mouthwatering! Even my beef burger-loving husband ate every bite and asked for more!
Turkey Jasmine Burgers
An Asian spin lends loads of fresh flavors to a traditional turkey burger.
Serves 4
Cucumber salad
1 cucumber -- peeled and thinly sliced rounds
1/2 red onion -- thinly sliced
1/4 cup rice vinegar
1/8 cup sugar
1 teaspoon salt
Burger
1 1/4 pounds ground turkey
1/3 cup steamed jasmine rice
1/4 cup panko
1/4 cup thinly sliced green onions
1 large egg
1/2 teaspoon sesame oil
1 tablespoon soy sauce
1 tsp. Siracha or other Asian chile sauce
1 teaspoon sugar
Salt and freshly ground black pepper
1 tablespoon peanut or canola oil
4 sesame hamburger buns
Wasabi Mayonnaise
1/2 cup mayonnaise
1 teaspoon wasabi powder
1/2 teaspoon minced ginger
1 teaspoon finely chopped lemon peel
Cucumber salad: Toss cucumbers, onions, rice vinegar, sugar, and salt in a medium sized bowl. Let it marinate at room temperature for 1 hour.
Burger: Mix ground turkey, rice, panko, green onions, egg, sesame oil, soy sauce, Thai chile, and sugar very well. Make into 4 patties. Season with salt and pepper.
Heat oil in a large skillet over medium-high heat. Saute burgers until cooked through, approximately 5 to 6 minutes per side (depending on how thick you make them). Or, throw them on the grill!
Wasabi mayonnaise: While burgers are cooking, toast buns, and mix mayonnaise, with wasabi powder, ginger, and lemon peel in a small bowl.
Drain cucumber salad well. Smear 1 tablespoon wasabi mayonnaise on toasted bun halves, spread with a layer of drained cucumber salad, then top with burger and cover with bun top.
Recipe adapted from Food Network
Monday, June 4, 2012
Spinach-Poblano Enchiladas with Chicken
I made these enchiladas for the first time a few weeks ago during a personal chef cookdate. They looked so delicious that I just had to create them at home. They were a huge hit! The filling is creamy and flavorful from the smoky roasted poblano peppers, loads of spinach, and Mexican cheese. As fantastic as the filling is, the sauce takes this dish over the top. If you've never made your own enchilada sauce get ready for a real treat! Yes, it takes some time, but it isn't difficult and the results are totally worth it. This sauce starts by roasting tomatoes, onions and garlic then blending the roasted veggies with Mexican chile peppers. Once blended you cook the sauce in a saute pan to bring the flavors together. It is incredible, so deep in flavor from the oven roasting and the authentic chiles. You'll never used canned sauce again! Make a double batch, this sauce would be amazing on any enchilada or other Mexican dish. After the enchiladas are assembled they are smothered in monterey jack cheese and baked until bubbling. Served with rice and guacamole, this is an unforgettable Mexican meal!
Spinach-Poblano Enchildas
A creamy filling topped with a smoky flavorful homemade enchilada sauce, this is my favorite enchilada recipe ever!
Serves 4
1 onion, diced
2 cloves garlic, minced
1 teaspoon kosher salt
1/4 teaspoon black pepper
2 tablespoons all-purpose flour
1 cup half and half
2 roasted poblano chiles, chopped (instructions follow)
1 16 oz frozen chopped spinach, thawed and squeezed dry
1 large chicken breast, cooked and diced (optional)
1/2 cup queso fresco (or other Mexican cheese)
1 tablespoon fresh lime juice
8 6" flour tortillas
2 cups Tomato Chile Sauce, recipe follows
1 cup monterey jack cheese, shredded
2 green onions, sliced, for garnish
Preheat oven to 400°
Saute onion in 2 T. butter in a large saucepan over medium-high heat, 3 minutes. Add garlic, salt, and pepper; saute 1 minute. Add flour; cook 5 minutes, stirring frequently.
Gradually add half and half, stirring constantly. Bring to a boil, reduce heat, and simmer 5 minutes.
Add poblano, spinach, and diced chicken; cook 5 minutes.. Stir in crumbled cheese and lime juice.
Assemble enchiladas. Warm tortillas in microwave until flexible (if needed). Spread a thin layer of sauce over the bottom of a 9x13 baking dish. Dip tortillas in 1 cup chile sauce, fill each with 1/3 cup filling, roll, place in baking dish, and top with 1 cup sauce and shredded cheese. Bake enchiladas for 20 minutes until cheese is bubbling. Garnish with sliced green onions.
To make Roasted Poblano Chiles, heat oven to broil. Place chiles on a sheet pan close to the broiler, and cook on all sides, turning occasionally, until blackened and blistered all over. Put in a plastic bag and seal. Let stand until cool enough to handle, at least 20 minutes. Remove chiles from the bag and rub to release the skins, discard skins and seeds. Chop chiles for recipe.
Tomato Chile Sauce
1 1/2 cups chicken broth (or water)
2 dried pasilla pepper, seeded*
2 dried guajillo chiles, seeded
2 cups onion, chopped
2 teaspoons sugar
2 tablespoons olive oil
3 cloves garlic, sliced
1 pound roma tomatos, quartered
1 tablespoon dried oregano
1 tablespoon red wine vinegar
1 1/2 teaspoons kosher salt
Preheat oven to 450 degrees.
Bring broth to a boil.. Pour over chiles in a bowl; let stand 30 minutes, or until soft. Drain; reserve broth.
Combine onions, garlic and tomatoes on a greased sheet pan. Roast in oven for 25 minutes, stirring occasionally.
Combine chiles, roasted tomato mixture, oregano, vinegar, and salt in a food processor; pulse to chop. Add reserved rehyfrating broth to chile mixture; process until smooth.
Heat in a large nonstick over medium heat until hot. Slowly add sauce to pan and fry 1 minute. Reduce heat; simmer 15-20 minutes, stirring occasionally.
*Ingredient note: I found both dried pasilla peppers and dried guajillo chiles at my grocery store near the mushrooms in the produce section. They last forever and you'll use them again to make this sauce!
Spinach-Poblano Enchildas
A creamy filling topped with a smoky flavorful homemade enchilada sauce, this is my favorite enchilada recipe ever!
Serves 4
1 onion, diced
2 cloves garlic, minced
1 teaspoon kosher salt
1/4 teaspoon black pepper
2 tablespoons all-purpose flour
1 cup half and half
2 roasted poblano chiles, chopped (instructions follow)
1 16 oz frozen chopped spinach, thawed and squeezed dry
1 large chicken breast, cooked and diced (optional)
1/2 cup queso fresco (or other Mexican cheese)
1 tablespoon fresh lime juice
8 6" flour tortillas
2 cups Tomato Chile Sauce, recipe follows
1 cup monterey jack cheese, shredded
2 green onions, sliced, for garnish
Preheat oven to 400°
Saute onion in 2 T. butter in a large saucepan over medium-high heat, 3 minutes. Add garlic, salt, and pepper; saute 1 minute. Add flour; cook 5 minutes, stirring frequently.
Gradually add half and half, stirring constantly. Bring to a boil, reduce heat, and simmer 5 minutes.
Add poblano, spinach, and diced chicken; cook 5 minutes.. Stir in crumbled cheese and lime juice.
Assemble enchiladas. Warm tortillas in microwave until flexible (if needed). Spread a thin layer of sauce over the bottom of a 9x13 baking dish. Dip tortillas in 1 cup chile sauce, fill each with 1/3 cup filling, roll, place in baking dish, and top with 1 cup sauce and shredded cheese. Bake enchiladas for 20 minutes until cheese is bubbling. Garnish with sliced green onions.
To make Roasted Poblano Chiles, heat oven to broil. Place chiles on a sheet pan close to the broiler, and cook on all sides, turning occasionally, until blackened and blistered all over. Put in a plastic bag and seal. Let stand until cool enough to handle, at least 20 minutes. Remove chiles from the bag and rub to release the skins, discard skins and seeds. Chop chiles for recipe.
Tomato Chile Sauce
1 1/2 cups chicken broth (or water)
2 dried pasilla pepper, seeded*
2 dried guajillo chiles, seeded
2 cups onion, chopped
2 teaspoons sugar
2 tablespoons olive oil
3 cloves garlic, sliced
1 pound roma tomatos, quartered
1 tablespoon dried oregano
1 tablespoon red wine vinegar
1 1/2 teaspoons kosher salt
Preheat oven to 450 degrees.
Bring broth to a boil.. Pour over chiles in a bowl; let stand 30 minutes, or until soft. Drain; reserve broth.
Combine onions, garlic and tomatoes on a greased sheet pan. Roast in oven for 25 minutes, stirring occasionally.
Combine chiles, roasted tomato mixture, oregano, vinegar, and salt in a food processor; pulse to chop. Add reserved rehyfrating broth to chile mixture; process until smooth.
Heat in a large nonstick over medium heat until hot. Slowly add sauce to pan and fry 1 minute. Reduce heat; simmer 15-20 minutes, stirring occasionally.
*Ingredient note: I found both dried pasilla peppers and dried guajillo chiles at my grocery store near the mushrooms in the produce section. They last forever and you'll use them again to make this sauce!
Wednesday, May 30, 2012
Vegetarian Thai Curry
I love coconut curry, and it's so easy and delicious to make at home. I recently tried a new recipe for the classic Thai dish, and it is definitely a keeper. The curry is has a very gentle heat that warms the mouth but does not leave behind any lingering spice. The flavor is absolutely divine! This vegetarian version is loaded with fresh vegetables simmered in a coconut curry sauce sweetened with a touch of brown sugar. The sauce is so simple, and you can modify the recipe to include any vegetable you enjoy, or you can even add meat! Enjoy this meal with a side of fresh spring rolls and jasmine rice.
Vegetarian Thai Curry
A medley of fresh vegetables simmered in creamy coconut milk.
Serves 4
1 cup coconut milk
1 cup water
1 tablespoon brown sugar
1 tablespoon red curry paste
2 tablespoons vegetable oil
1/2 cup onion, diced
1 tablespoon garlic, minced
1 tablespoon fresh ginger, minced
1 cup red potato, cubed
1 cup green beans, halved
1 cup cauliflower, florets
1 cup eggplant, chopped
1/2 cup red bell pepper, sliced
2 tablespoons fresh lime juice
Salt and pepper, to taste
2 tablespoons fresh cilantro, torn
2 tablespoons dry-roasted peanuts, chopped
Whisk the coconut milk, water, sugar, and curry paste in a bowl and set aside.
Heat the oil in a large skillet over medium-high. Add the onion, garlic, and ginger; sauté 3 minutes. Stir in the potatoes and coconut milk mixture; simmer 10 minutes. Add the beans and cauliflower, and simmer for 5 minutes. Then stir in the eggplant and bell pepper and simmer 5 more minutes, or until sauce is thickened, stirring occasionally.
Stir in lime juice, salt, and pepper. Garnish each serving with cilantro and peanuts. Serve with warm jasmine rice.
Recipe by Sarah Lang
Vegetarian Thai Curry
A medley of fresh vegetables simmered in creamy coconut milk.
Serves 4
1 cup coconut milk
1 cup water
1 tablespoon brown sugar
1 tablespoon red curry paste
2 tablespoons vegetable oil
1/2 cup onion, diced
1 tablespoon garlic, minced
1 tablespoon fresh ginger, minced
1 cup red potato, cubed
1 cup green beans, halved
1 cup cauliflower, florets
1 cup eggplant, chopped
1/2 cup red bell pepper, sliced
2 tablespoons fresh lime juice
Salt and pepper, to taste
2 tablespoons fresh cilantro, torn
2 tablespoons dry-roasted peanuts, chopped
Whisk the coconut milk, water, sugar, and curry paste in a bowl and set aside.
Heat the oil in a large skillet over medium-high. Add the onion, garlic, and ginger; sauté 3 minutes. Stir in the potatoes and coconut milk mixture; simmer 10 minutes. Add the beans and cauliflower, and simmer for 5 minutes. Then stir in the eggplant and bell pepper and simmer 5 more minutes, or until sauce is thickened, stirring occasionally.
Stir in lime juice, salt, and pepper. Garnish each serving with cilantro and peanuts. Serve with warm jasmine rice.
Recipe by Sarah Lang
Thursday, May 10, 2012
Peek Inside a Personal Chef Cookdate
I am blessed to apprentice with a local peronal chef who is teaching me all about the personal chef business. Now, I know some people might want to know- What is a personal chef? A personal chef is hired by individuals to go to their home and prepare wonderful meals in their kitchen, which are left in the refrigerator to be consumed when they wish.
Who hires personal chefs? No, not (only) rich people! Most of our clients are working parents with a family to feed and no time to spend menu planning and cooking. They want to eat wholesome, homemade food in their own home. This is a convenient and affordable way to eat delicious food made with love by trustworthy hands at home.
On our weekly cookdate my mentor and I normally prepare three to four entrees plus side dishes each serving four, which takes between 3-5 hours. I normally join my mentor at her clients' homes, but this week for the first time I did one all on my own. I provided a list of menu options and my client selected three entrees. I purchased the groceries and cooked the meal in their home. It was a joy to create this meal and felt so natural to plan my own cookdate. Here is a look at the menu they selected.
Fizzy Chicken with Lemon Vinaigrette
Served with sweet roasted carrots

Baby carrots roasted in the oven with walnuts, red onion and raisins, then tossed with dill and cilantro.
New Orleans Shrimp Creole
Served with basmati rice and French baguette
A thick stew made from seafood stock, tomatoes, veggies and shrimp, spiced up with hot sauce and cayenne pepper, served with warm baguette for dipping.
Basmati rice cooked with onions, butter, scallions and parsley is perfect atop the Shrimp Creole.
Indian Chicken Tandoori with Yogurt Sauce
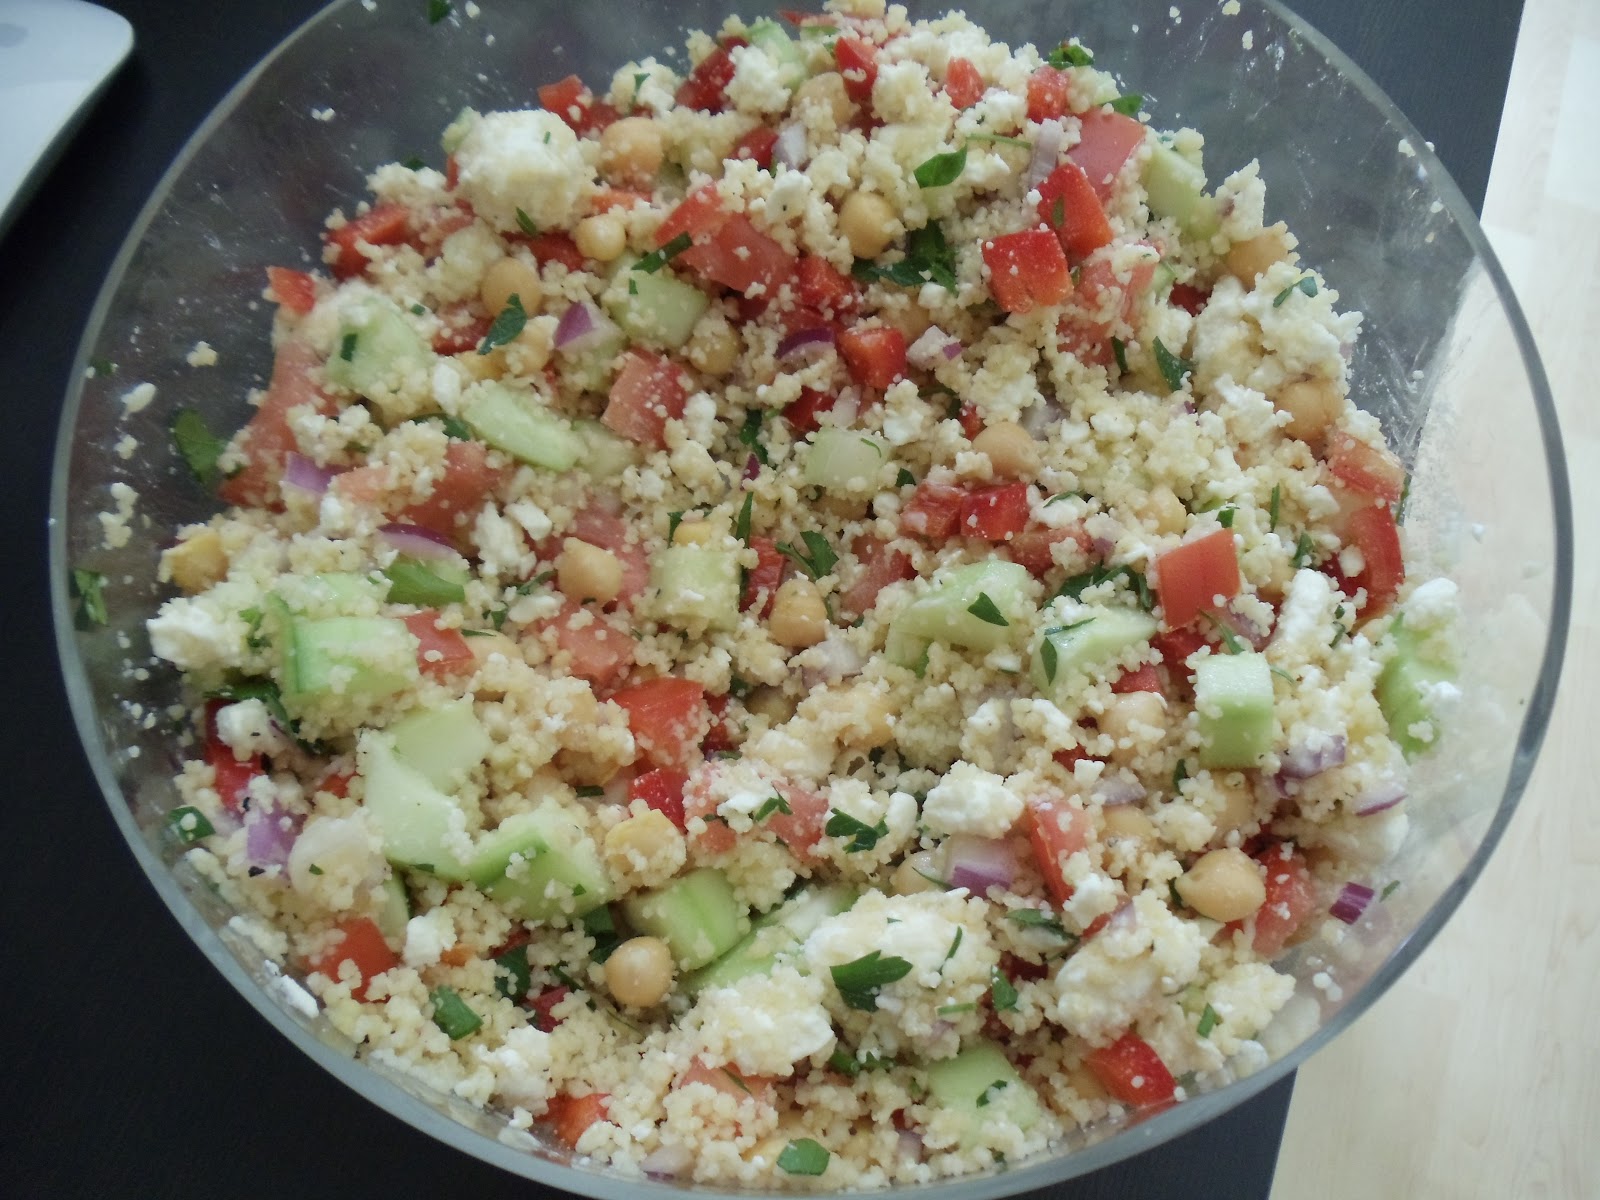
Served with a feta, chickpea and veggie couscous salad
A creamy yogurt sauce full of delicious mid-eastern spices coats chicken thighs, served with a cool cucumber sauce with paprika and dill (not pictured).
A couscous salad tossed with lemon and olive oil and bursting with fresh veggies, chickpeas, herbs and feta cheese makes a refreshing and healthy side dish.
Once all these fabulous foods are prepared I package them in handy-dandy plastic containers, label, and place them in the client's fridge.
What will they eat first??
Then I leave re-heating instructions and well wishes for happy eating!
Who hires personal chefs? No, not (only) rich people! Most of our clients are working parents with a family to feed and no time to spend menu planning and cooking. They want to eat wholesome, homemade food in their own home. This is a convenient and affordable way to eat delicious food made with love by trustworthy hands at home.
On our weekly cookdate my mentor and I normally prepare three to four entrees plus side dishes each serving four, which takes between 3-5 hours. I normally join my mentor at her clients' homes, but this week for the first time I did one all on my own. I provided a list of menu options and my client selected three entrees. I purchased the groceries and cooked the meal in their home. It was a joy to create this meal and felt so natural to plan my own cookdate. Here is a look at the menu they selected.
Fizzy Chicken with Lemon Vinaigrette
Served with sweet roasted carrots
Chicken breasts are pan seared then gently cooked in fizzy sauce made from club soda, butter, and red pepper flakes, and is served with a creamy lemon and chive vinaigrette on the side.
Baby carrots roasted in the oven with walnuts, red onion and raisins, then tossed with dill and cilantro.
New Orleans Shrimp Creole
Served with basmati rice and French baguette
A thick stew made from seafood stock, tomatoes, veggies and shrimp, spiced up with hot sauce and cayenne pepper, served with warm baguette for dipping.
Basmati rice cooked with onions, butter, scallions and parsley is perfect atop the Shrimp Creole.
Indian Chicken Tandoori with Yogurt Sauce
Served with a feta, chickpea and veggie couscous salad
A creamy yogurt sauce full of delicious mid-eastern spices coats chicken thighs, served with a cool cucumber sauce with paprika and dill (not pictured).
A couscous salad tossed with lemon and olive oil and bursting with fresh veggies, chickpeas, herbs and feta cheese makes a refreshing and healthy side dish.
Once all these fabulous foods are prepared I package them in handy-dandy plastic containers, label, and place them in the client's fridge.
What will they eat first??
Then I leave re-heating instructions and well wishes for happy eating!
Subscribe to:
Posts (Atom)